Saturday, December 26, 2009

Secret Santa Swap Reveal

Okay, so my reveal is not so secret. I signed everything on the back, LOL. Anyway, I was invited to participate in a Secret Santa Designer Swap and thought it might be fun. The directions were for participants to create an altered book or journal, a tag, an ornament, and a card. Well, the card I included was the one featured on the A Muse blog for Fast and Fabulous Christmas cards, and the ornament I didn't get a picture of. I was in a serious time crunch to get it to its recipient in time for Christmas. I promise it was cute, though.

I created this fun altered book for my recipient. I sure wish I hadn't chosen hot pink paper to set it on to take the pics, though. Blech!

(Cover)

(Page 1)

(Page 2)

(Page 3)

(Page 4)

(Page 5)

(Page 6)

(Page 7)

(Page 8)

Here's my tag:

I sure hope my recipient liked her items. I sure had fun making them. I'll post pics of what I received in a day or two. I have to take pics of them first. Hope you all had a very Merry Christmas. I had a great time with family and received a handy, dandy Sony Webbie HD video camera so now I can film my tutorials!! Wohoo!!

Sunday, December 20, 2009

Baked Goods

I don't know what it is about this holiday season but I am SO behind the ball!! Normally my house is decorated and my tree up the weekend of Thanksgiving but not this year. I just got the tree up earlier this week. Luckily, I did some crazy shopping on Black Friday so I'm not really running around freaking out about needing to buy gifts.

One of my Christmas traditions is to take a weekend and bake like a madwoman. I usually bake about 11 or 12 different things, double batches, and disperse them out. This year I only managed 9 things. I was just too pooped!

Layer 1 (below): Sugared Date Squares, Pecan Tassies, Birds Nests (jam thumbprint cookies), Caramel Balls, and Almond Florentine Bars.

Layer 2 (below): Cranberry Orange Tassies, 5-Minute Fudge, Butterscotch Shortbread Bars, Sugar Cookies.

Here's a pic of everything but the sugar cookies.

Now multiply what you see in that last pic by oh, say 15 - 20 gift boxes, and you have an idea of what I had to make. But it's all baked with love, people!

Monday, December 7, 2009

Slice Embossing Picture Tutorial

Today's picture tutorial is for the Making Memories Slice Embossing Tips. My Slice setting is at 'draw/emboss'.

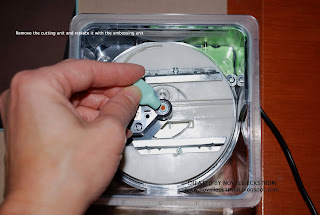
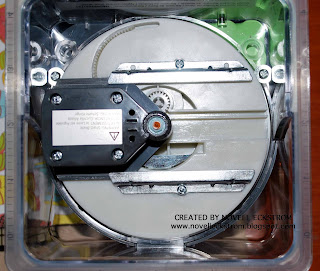
^ First you must remove the cutting unit and replace it with the embossing tip unit. I selected the finest embossing tip.


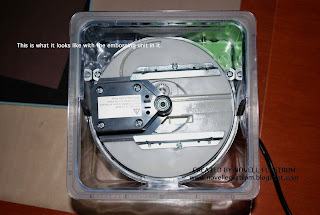
^ Here's what it looks like with the embossing tip in it.


^ Place your Slice in the far left corner of your patterned paper with the side you want raised, face down. This is double sided American Crafts patterned paper with solid brown on the other side. Placing your Slice in the far left corner will make it easy to line things back up when you are ready to cut. *** You must use the embossing mat ***


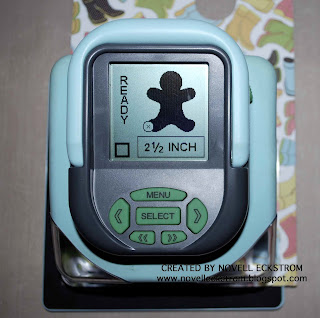
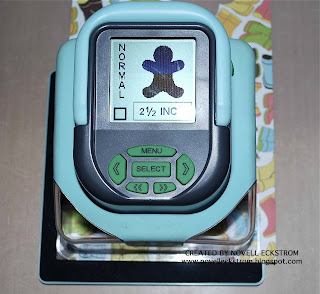
^ Select your image under a 'normal' cutting setting.


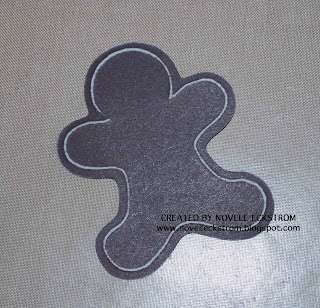
^ This is what you get on the backside. Cute little gingerbread man from the Mistletoe cartridge.


^ Remove your embossing unit and replace it with your cutting unit. No need to overtighten! I just twisted the tool until it was hand-tight, then turned it counter-clockwise 2 notches for my blade depth. That's the one that seems to work for my machine. Don't forget to change your Slice setting back to 'cut'


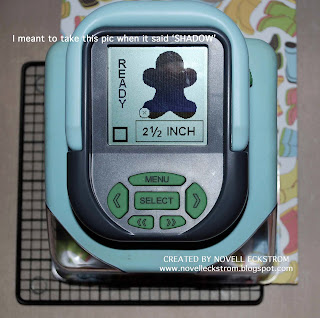
^ I meant to take this pic while it said 'SHADOW' but I had already hit select. Anyway, realign your patterned paper on your cutting mat; place your Slice in the far left corner! Select 'SHADOW' and push 'SELECT' to make your cut.


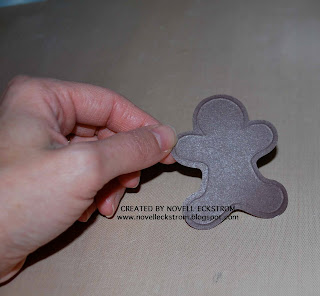
^ This is what you get when you cut it out!


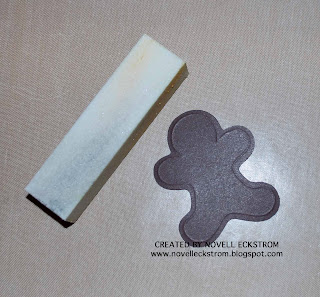
^ Using a fine sanding block, lay the block flat against your diecut and lightly sand the raised image.


^ And Voila! Here is your cute little embossed gingerbread man.


Hope you enjoyed today's tutorial. Now you all run out and buy yourselves some embossing tips.

Wednesday, December 2, 2009

Gift Card Holder Tutorial


This is going to be a long post but it'll be worth it! I'm going to teach you how to make this fun gift card holder. You can create additional pockets to hold more gift cards if you want, but I only created 2. I must apologize in advance for some of the blurry photos but we had no sun, my camera battery was about to die, I couldn't find my charger so I had to hurry, and I was standing on a chair that spins. Let's get started!


^ First you need a piece of cardstock that measures 3" x 10".


^ Score this piece at 2.5"


^ Shift your piece of cardstock over to the 1" line then score again at 4.25"


^ Shift your cardstock back to the far left and score at 7".


^ Shift your cardstock over 1/4" then score at 8".


^ The picture above is what you should have once you fold at your scored lines.


^ Now you need another piece of cardstock measuring 4" x 5.75". You will need one piece for each pocket you make. I probably wouldn't put more than 3 pockets in this holder but you could probably squeeze 4 in if you need to.


^ Shift your paper over 1/4" and score at the 1/2" mark.


^ Shift your cardstock over to the 1/2" mark and score at 3.5". I forgot to put the bone folder at the score line for you. Sorry!


^ Turn your cardstock sideways as shown. Score down the length at 1/2".


^ Trim your pocket so it looks like this.


^ Get your handy dandy Scor-Tape out. I used the 1/4" width. I love this stuff cuz you can tear it! . Add tape as shown.


^ Can you see how it's going to go together?
****** DON'T REMOVE THE LINER FROM THE BOTTOM FLAP YET ****


^ Use a 1 1/4" circle punch to create a notch to make it easier to get the gift card out.


^ Decorate the front of the pocket with patterned paper. I used a 1 1/2" punch to create a notch that layers. See, my tape liner on the bottom flat is still there!! Hope you remembered not to take yours off.


^ Now you can take the bottom tape liners off and attach the pockets to the inside of your holder.


^ I covered up the bottom flaps with a small strip of patterned paper. Your recipient will appreciate the attention to detail.


^ Decorate the front as you wish. I used Basic Grey Magnetic snaps to hold the flaps closed. And how handy is this tip.....I used the 1/4" Scor-Tape across the top on the inside to add the wonderfully yummy brown stitched grosgrain ribbon as a handle. There is no way that sucker is coming off! Now, you all run out and make your own gift card holders then link your creations so I can see them. Go on!

Friday, November 20, 2009

There's a little cowboy in all of us

Stamps: 9-6148G Ride Em Cowboy; 7-7041D Fence; 8-8338B Howdy MA; 3-4067A tiny star
Papers: Paprika and Navy 4-bar notecards

I found this little cowboy cutie on the A Muse website a week or two ago and just had to get him. How cute is he?!!! I decided to put him on a dappled gray so it would set off the cowboy's colors. If I colored the horse brown, I was afraid the boy wouldn't stand out so much. Anyway, fun, quick, easy peasy card for the little cowboy in your life. We all have one. There's a little cowboy in all of us.

Wednesday, November 18, 2009

Gift Cards


I created this fun giftcard holder for my last class and thought I'd share it with you all. I used the idea out of the latest Paper Crafts Holiday Cards issue. Unfortunately, I can't locate it at the moment to be able to tell you who created the actual design. Anyway, for this card I used a 12x12 sheet of red cardstock and cut it down to 5.5 x 12. I scored each end at 4.25". Fold the strip in half and it will leave you a score mark in the middle. Fold it all up accordion style so that you have a little "mountain" in the middle. I then used a Quickutz die very much like the Stampin Up Top Note die to cut out a fancy design in the accordion piece in the middle of the card (see pic below). You could easily use a punch to accomplish the same thing....like a Marvy oval punch. Slide a giftcard inside and voila! Nifty little giftcard holder. On the inside of my card I used some pretty apple shimmer couture paper.


Friday, November 13, 2009

Classes, classes, classes


I'd love for you to join me next week on Wed, Nov 18 for a fun class at Stampin-In-The-Rain. This class will focus all about giving!! We'll be creating some unique gift card holders and a rip-it-out tag book for the upcoming holidays.

It's in The Giving
Wed, Nov 18 6-8pm
Stampin-In-The-Rain
Bothell Country Village
Bothell, WA 425 408-9050


A few days later on Sunday, Nov 22 I'll be offering my 2010 Calendar class. We'll create a really cute calendar based on the 4-bar card size and bind it all up with a Bind-It-All. If you don't have one of those yet, it's a great opportunity to play with one and see for yourself how fantastic this machine is!

2010 A Muse Calendar
Sun, Nov 22 1-4pm
Stampin-In-The-Rain
Bothell Country Village
Bothell, WA 425 408-9050

Please be sure to bring a basic kit to each class!! Call the store directly to sign up. Hope to see you there!

Tuesday, November 10, 2009

Fall and Holiday


I stopped at Michaels today and picked up some pretty glitter holiday picks I thought would come in handy for some Fall/Thanksgiving cards. I just use wire cutters to remove the leaves I want. You can add lots of bling very simply by using picks like these for very little cost. These were on sale for less that $.50 a piece, I think. I have a lot of leaves I can use for that half dollar!


I've also been really busy with work and creating cards for the troops our office adopted for the holidays. I made them all the same Thanksgiving card...pretty Plain Jane but wanted to make them each their own, unique holiday card. I picked up a box of K&Co Christmas Chipboard and used them to create lots of cards. I also found some nice Christmas sentiments by Impression Obsession that were perfect, too. I needed these cards to be big enough for about 40 people to sign so I knew my A Muse 4-bar notecards weren't gonna cut it. I had some Rubber Soul A2 notecards in a stash that I needed to use up so I figured, what better reason than this? I have tons of patterned paper so I put that to use, too. I'll be sharing some of the cards I made over the next few days, weeks, whatever, until I get tired of them.

Hope you are all out there staying healthy, enjoying your family time and/or activities, and planning your holiday cards. The countdown is on and the time is flying by!!!

Friday, October 16, 2009

Expressions of Gratitude


I took a little different twist with this one. I've been designing an Asian Inspiration class. Once I saw Sherri's post yesterday I knew I could incorporate it into the class I was designing. So, you'll be seeing this one in one of my classes in January.

I found some interesting tidbits about the symbolism of chrysanthemums in Asian culture. According to the Teleflora website, Japan holds a celebration each year called the "Festival of Happiness" to celebrate this flower. Japanese consider the orderly unfolding of the flower's petals to represent perfection. Confucius once suggested they be used as an object of meditation. From the FTD website, in China, the chrysanthemum's association with autumn stems from its tendency to bloom in the fall. Consequently, the ancient Chinese chose the Chrysanthemum ("chu hua") as their Flower for October, a symbol of the rest and ease that followed the season's final harvest. It's also believed that if you put a single petal of the flower into the bottom of a wine glass it will encourage longevity and happiness.

Well, today is release day. You can head on over to the A muse website to purchase these pretties for yourself. BUT.....you do have a chance to win a complete set of the wood mounted stamps!!! See this post for your chance to win. Goodluck and happy stamping!